
The excellent, fan-created Metroid II remake “AM2r” is now available as part of the TwisterOS Raspberry Pi operating system. While this was possible before, there’s one huge difference: The previous version of AM2r on a RPi was 86 Windows build, running via box86+WINE. This is an x86 Linux build, running only via box86, which should improve performance and reliability! More info and instructions on how to use it are below the links:
TwisterOS: https://twisteros.com/
Raspberry Pi 4: https://amzn.to/3afkkIK
My Favorite Raspberry Pi 4 Case: https://amzn.to/3wWKFoH
RetroTINK Ultimate Analog Output “Hat”: https://bit.ly/2QTc5IG
SNES-style USB controller: https://amzn.to/3uRmsy8
Wireless Mini USB Keyboard: https://amzn.to/37A52NM
Raspberry Pi Hardware & Software Info: https://www.retrorgb.com/rpi240p.html
AM2r is widely considered the best version of the game, with graphics, gameplay and music surpassing both the 1991 original and Nintendo’s official remake, 2017’s “Samus Returns”. Unfortunately, it can be challenging to play on anything other than a PC. This obviously isn’t an issue for people who already game on PC’s, but anyone wanting a console-like experience, or the ability to play on an RGB monitor had to resort to more complicated setups….until now.
If you’re just looking to play the game and are already familiar with using Raspberry Pi’s, simply load the latest version of TwisterOS onto any version of the RPi4 and you’ll find AM2r listed under “games”. If you’re new to RPi imaging, or want to learn how to set the game to auto-boot, please continue reading.
Loading TwisterOS is the same as any RPi build: Download and extract the OS, format your MicroSD card and use imaging software like Win32DiskImager to flash the OS to the card. Detailed instructions for this are available in the RPi section of the website. After flashing, connect your RPi4 to an HDMI monitor (even if you plan on eventually switching to an RGB solution) and wait for first boot – This could take a few moments. After it’s booted to the desktop, connect a USB keyboard & mouse and configure your settings; Change the output resolution (Menu\Settings\Display), connect a bluetooth controller, etc. If you plan on using the RPi’s HDMI output for gaming on a flat-panel, you’re pretty much done!
If you’re planning on using an RGB solution, or just want a dedicated “AM2r RPi image”, then you’ll want to set the OS to auto-boot the game. Here’s how (and thanks so much to Dan for the info!):
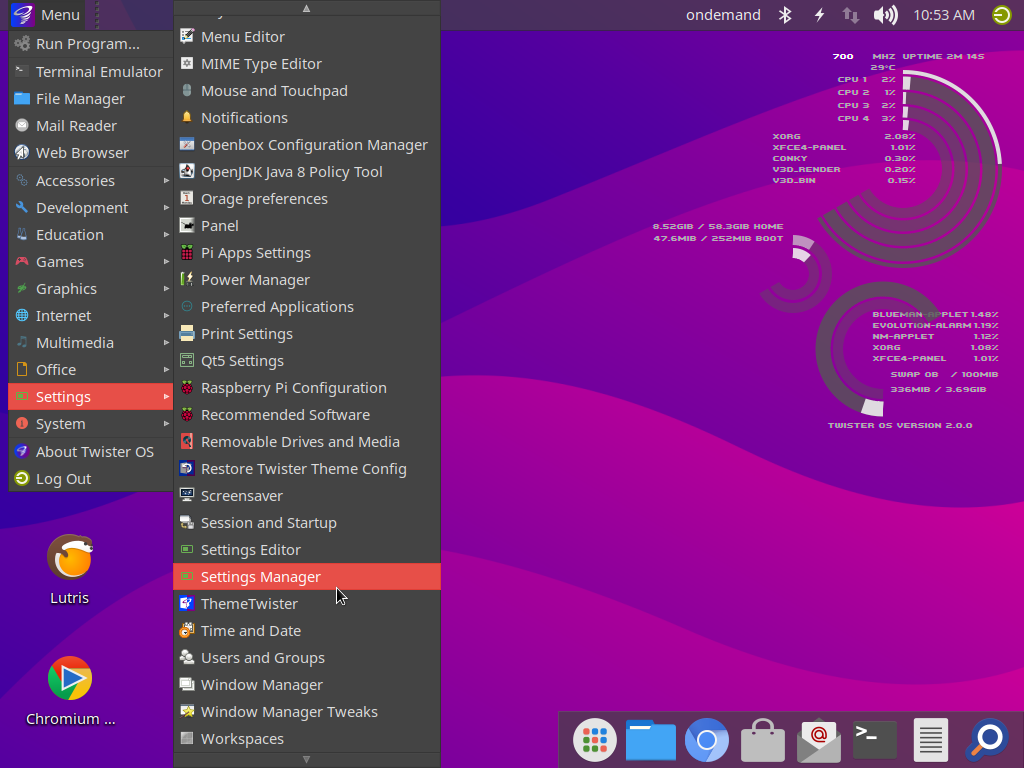
Start by going to Menu\Settings\Settings Manager (click all pictures for full-sized versions):
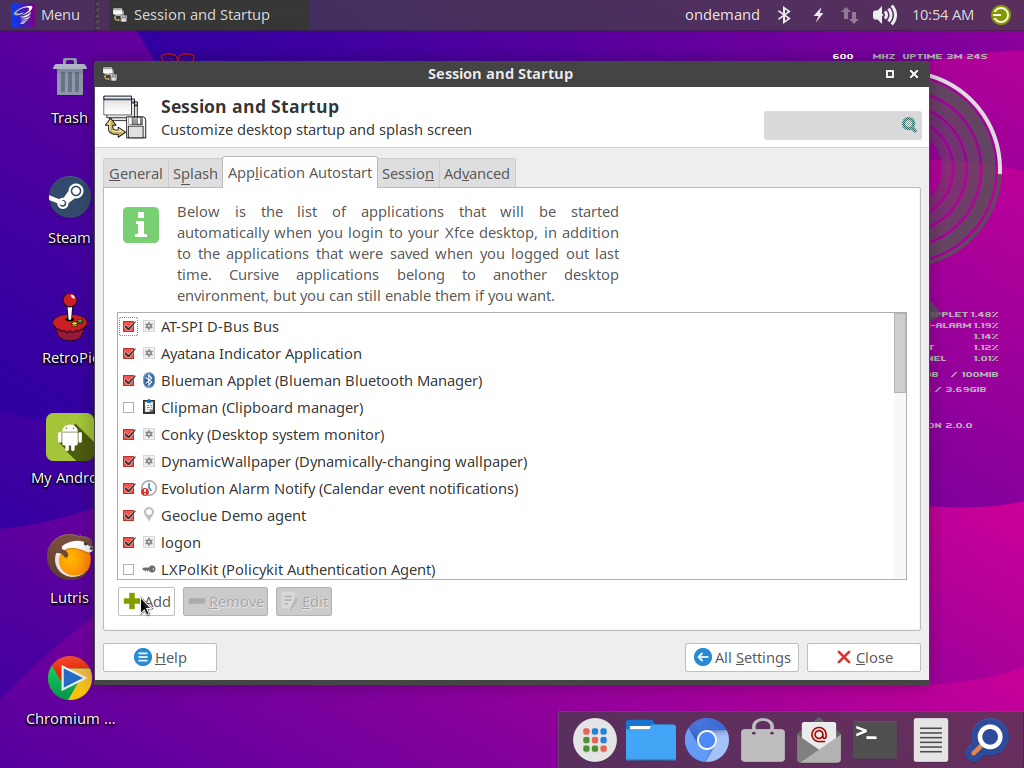
Scroll down and click on “Session & Startup”:

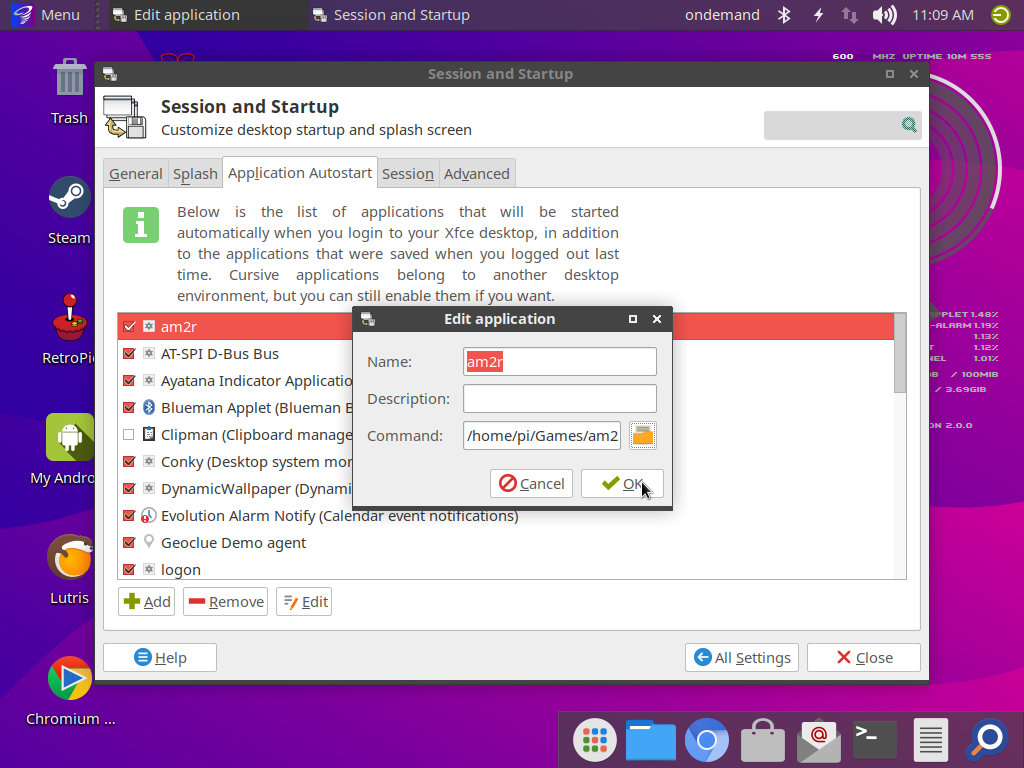
Click on the “Application Autostart” tab, then press the “add” button at the bottom of the box:
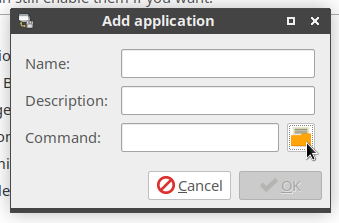
Click the file button to locate the AM2r launch file:
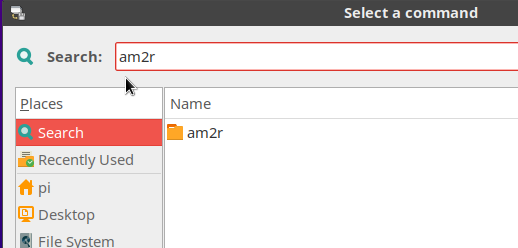
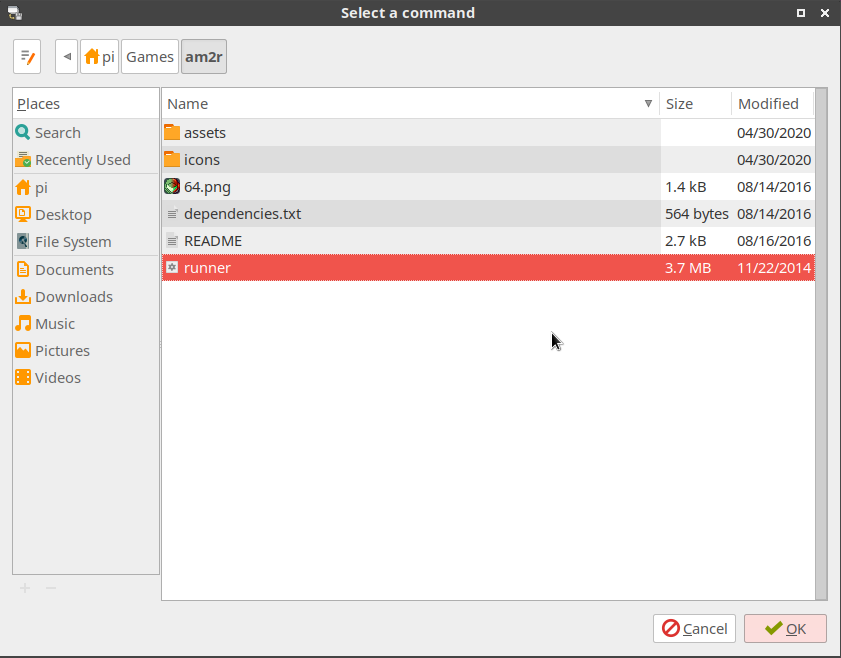
Select “search”, type “am2r” in the search box and hit enter:
Double click on the am2r folder, highlight the file named “runner” and hit “ok”:
Add a name to the application (I just used ‘AM2r’) and hit “ok”:
That’s it! The next time you boot your RPi, it will auto-boot into AM2r, essentially turning your MicroSD card into a “cartridge” for the game!
If you’d like to use an RGB monitor, I’d once again recommend checking out the RPi section of the website, for hardware and software suggestions. For my testing, I just used a gert666 adapter and added the following to TwisterOS’ config.txt file; No modification to the original contents of the file were necessary:
disable_audio_dither=1
dtoverlay=vga666
enable_dpi_lcd=1
display_default_lcd=1
dpi_group=2
dpi_mode=87
hdmi_timings=320 1 16 30 34 240 1 2 3 22 0 0 0 60 0 6400000 1 #240p
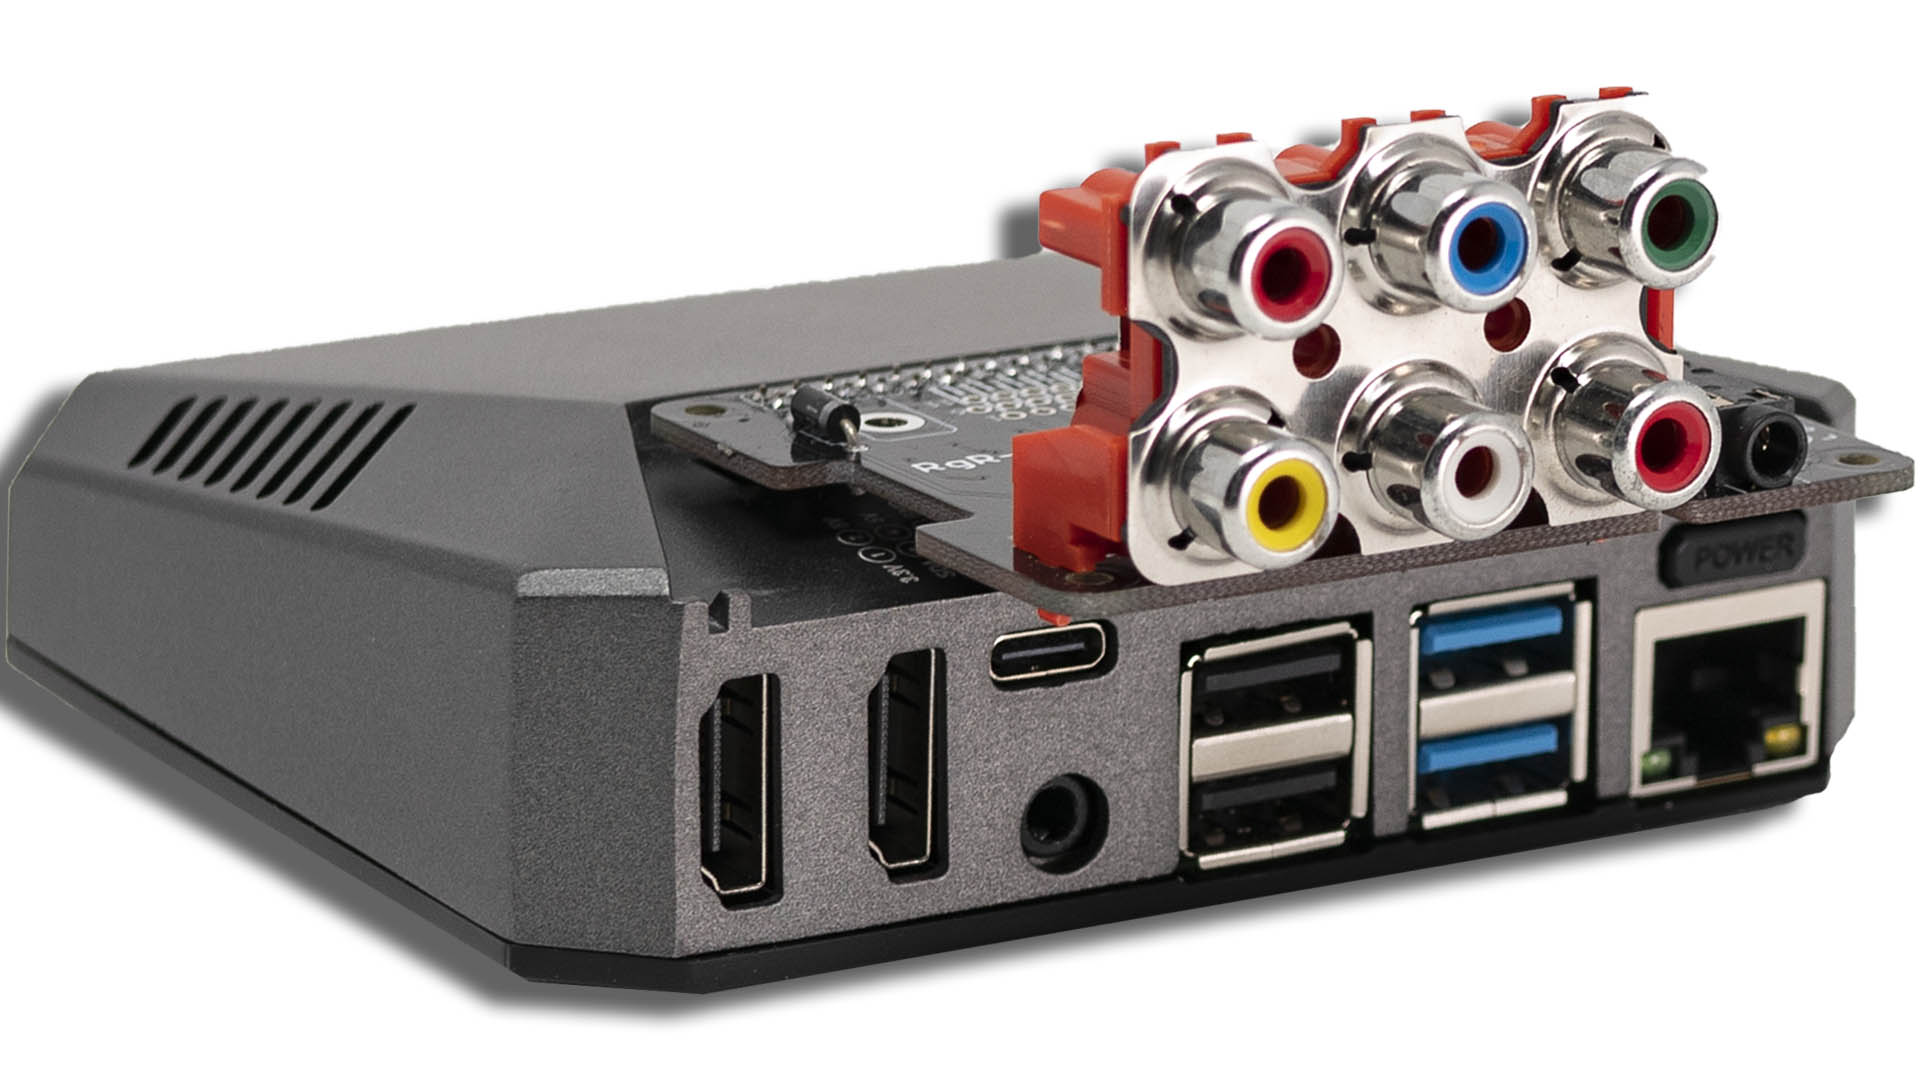
With the above configuration, it worked perfectly! As a note, that’s my favorite case for the RPi4!!! It’s small and efficiently breaks out the side ports to the rear…as well as provides two full-sized HDMI ports! It also moves the GPIO pins to the top-rear and even low-profile “hats” fit perfectly. I usually use the RetroTINK Ultimate, but only had the one from Retro Game Restore handy for these pictures.
As for performance, it was pretty much perfect. I used a RetroFlag SNES-style USB controller and there was zero configuration! I just booted the RPi and it was completely auto-detected, including button mapping. I was pretty impressed – I just hit Start and began playing!
The only issue I ran into was video noise that I often get with AM2r. This happened on both the HDMI and the RGB outputs and with both vsync toggles, but doesn’t seem to happen when I load the Windows version of the game on my laptop. We’ll update this post if we find a solution, but for now, you might be stuck with this issue as well. Check it out towards the bottom of the screen:
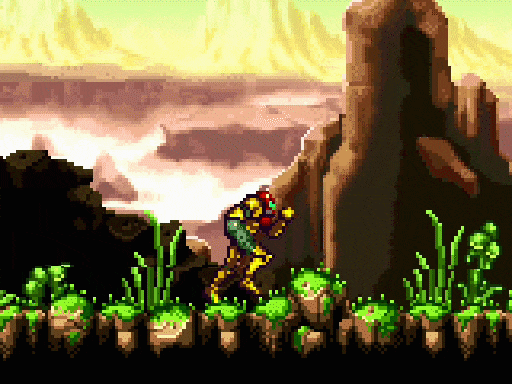
Overall, even with the weird video line, I still think this is an awesome way to experience AM2r!! If you already own a Pi4, I strongly recommend trying it out!
