
Creator Robert Dale Smith has produced an open source design for a USB to GameCube controller adapter which you can build yourself for about $8 in parts. This adapter is designed for using a wired USB controller on a real GameCube.
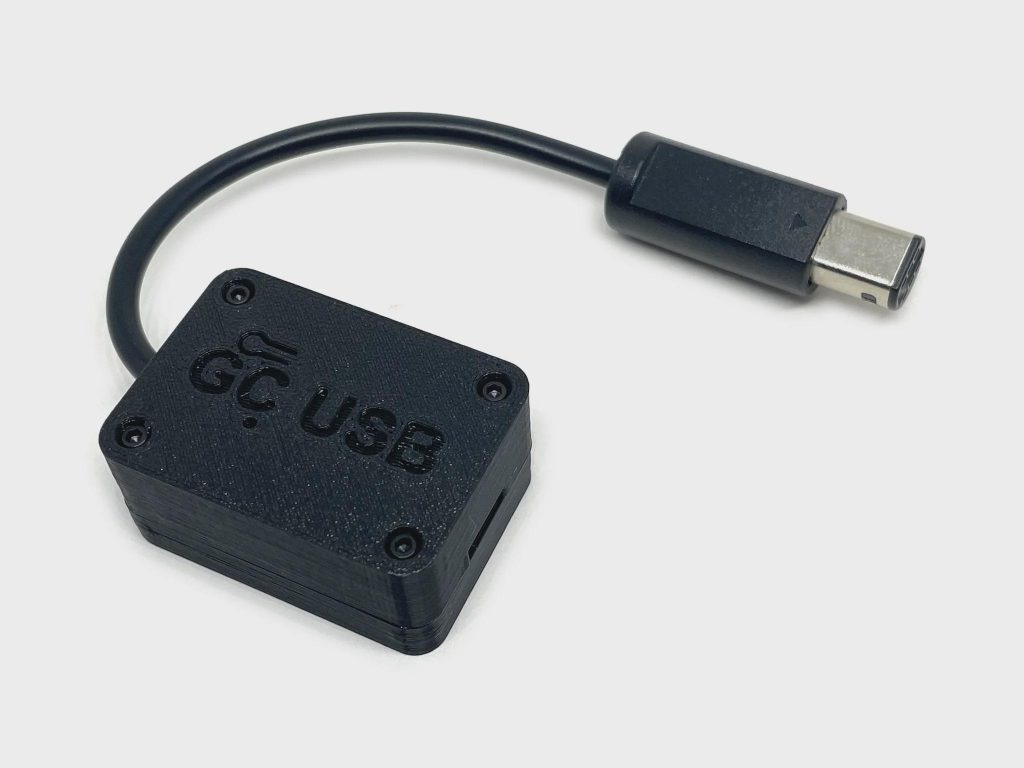
On the left we have my janky home made version. On the right we have a professionally made version with a nice 3D printed case, available on Robert’s webshop.
In the second half of this article I take you through the steps to build one yourself.
The parts list for this build is only 3 items
- Adafruit KB2040 board (any RP2040 based board should work, I built it with a RP2040-Zero)
- GameCube Controller Extension Cable
- USB-C to USB-A adapter (if you controller is USB-A)
- and the USBRetro Firmware from Robert
Why would you want to use this device?
- Use your favorite wired controller on a real GameCube (or Wii with GameCube ports)
- There are a few shmups and fighting games on the GameCube
- Use a standard keyboard / mouse as a GameCube controller
- Play Smash Bros with a keyboard. The default mapping is similar to the EdgeGuard adapter
- Use a standard keyboard as a GameCube keyboard for Phantasy Star Online
- Enabling the scroll lock on the keyboard toggles between simulating a GameCube controller or GameCube keyboard
Robert lists a wide range of compatible USB controllers
- Generic HID / X-input / D-input / Switch
- Nintendo Switch (Pro / JoyConGrip / Pokken)
- Xbox (OG / 360 / One / Series)
- PlayStation (PS Classic / PS3 / PS4 / PS5)
- Sega Astro City Mini USB Controller
- GameCube to Switch/Wii U Adapter
- RetroBit Sega Genesis 6-button USB Controller
- 8BitDo USB Wireless Adapters (Red / Gray)
- 8BitDo PCE 2.4g USB Receiver
- X-input Compatible Controllers
- Generic USB HID Gamepad / Joystick
A BlueRetro controller board or single controller dongle would also achieve this goal and are both great solutions. You might like to use this new adapter from Robert if:
- You want an easy project to build for 8 bucks
- Like me, you are a grumpy old man who likes wires
- Eliminate any possible wireless lag as this adapter has a consistent ~1ms
There are a few current limitations of this project
- There is no easy UI to remap buttons. If you wish to do so, you need to update the code and recompile the project yourself
How to Build a USB to GameCube USBRetro Adapter
Below I shall outline the steps I took to build an adapter myself. I don’t have a fancy 3D printer so the end result is not as pretty as the prebuilt versions sold by Robert, but it does the job just as well.
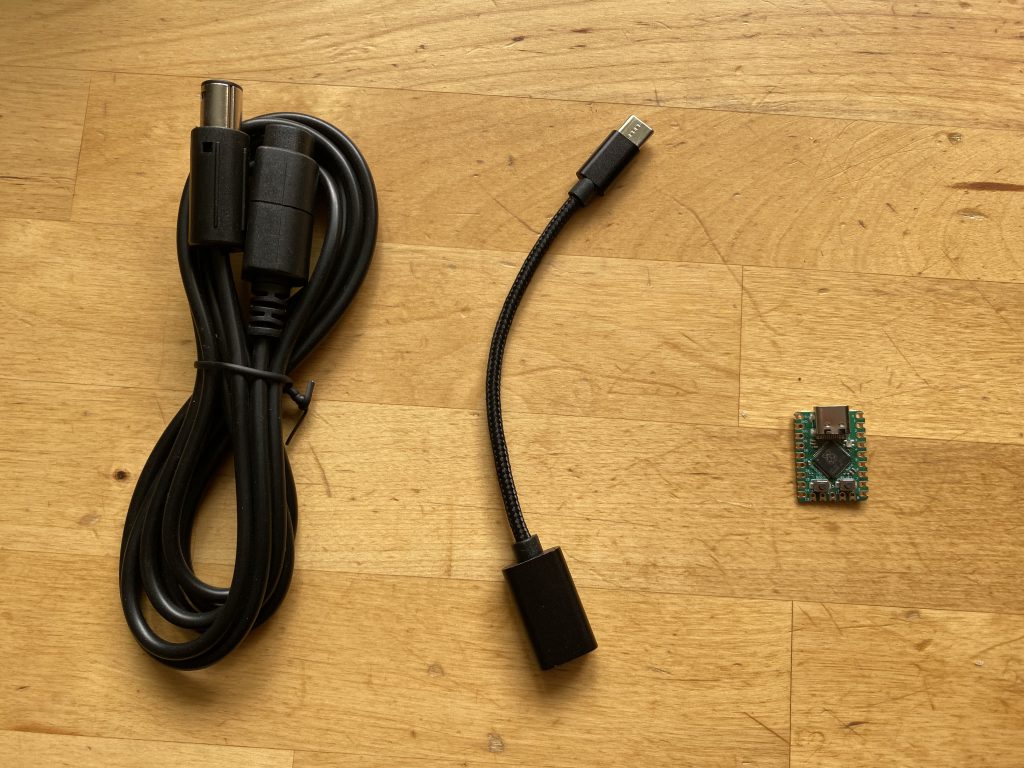
As I live in the United Social Socialist Republic of Europe, getting hardware from US based suppliers is often tricky. I elected to buy all my parts from AliExpress and wait the 4 weeks. Below is the parts list along with links to each product.
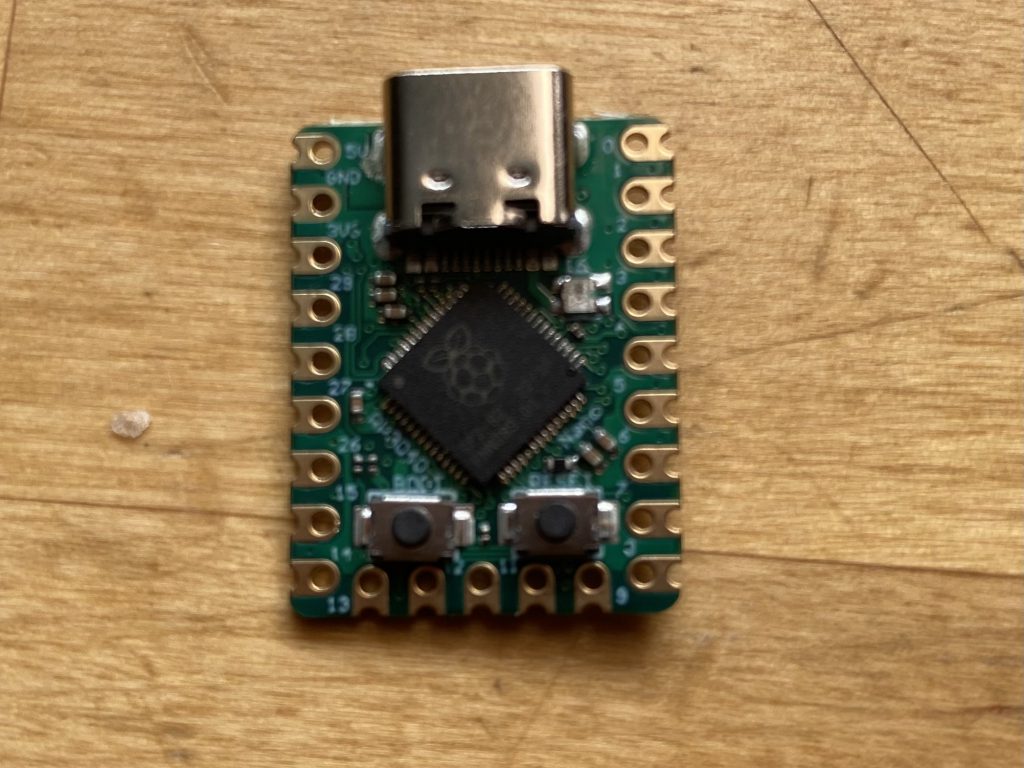
While Robert originally build this project around the Adafruit KB2040, any RP2040 based board should work. After some discussion on the USBRetro Discord server, user Stephen Best reported that a RP2040-Zero worked and these are readily available from AliExpress.
- RP2040-Zero
- GameCube Controller Extension Cable
- USB-C to USB-A adapter: The RP2040-Zero has a USB-C connector, so if your wired USB controller has USB-A, you will need this adapter. If your controller has USB-C built in, like an 8BitDo Arcade stick, this adapter isn’t required.
- (Optional) Screw terminals to make connecting the GameCube controller cable to the RP2040 easier
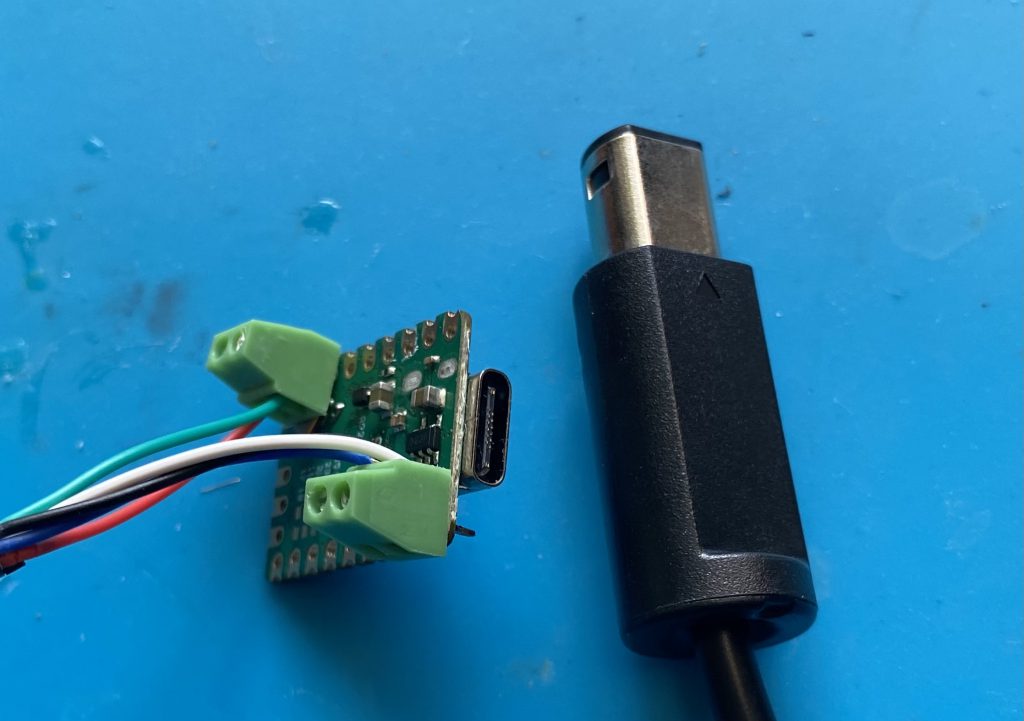
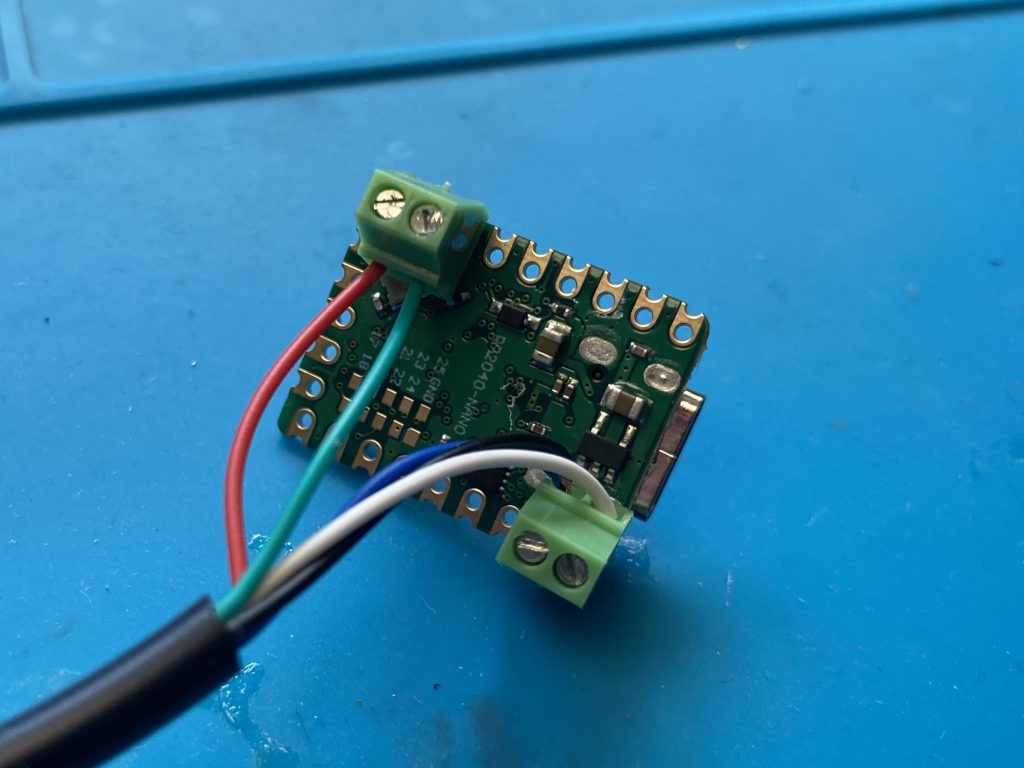
We will be cutting up the GameCube controller cable, separating out the wires and soldering them to individual pins on the RP2040-Zero.
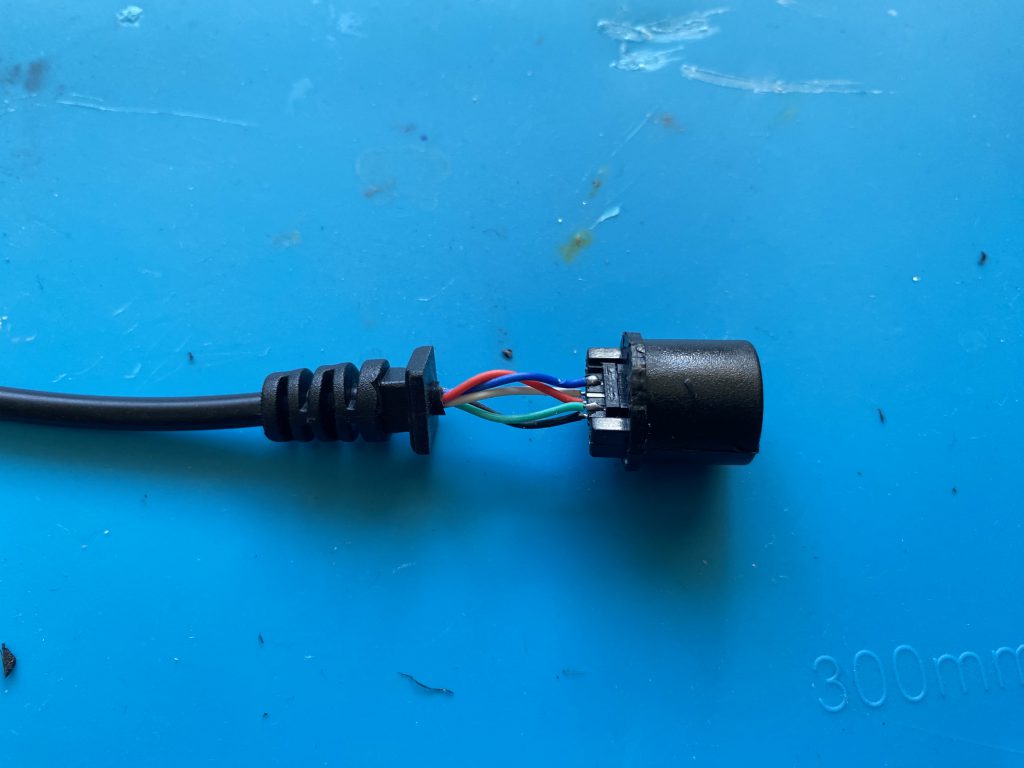
Start by cutting up your GameCube controller cable. You want to keep the end (male) which will plug into your GameCube. The other end (female) will be used in the next step and after discarded. The length of the cable is up to you. I elected for about 50cm so my RP2040-Zero can hang well clear of the console. Having a shorter cable as in Robert’s reference example is also fine.
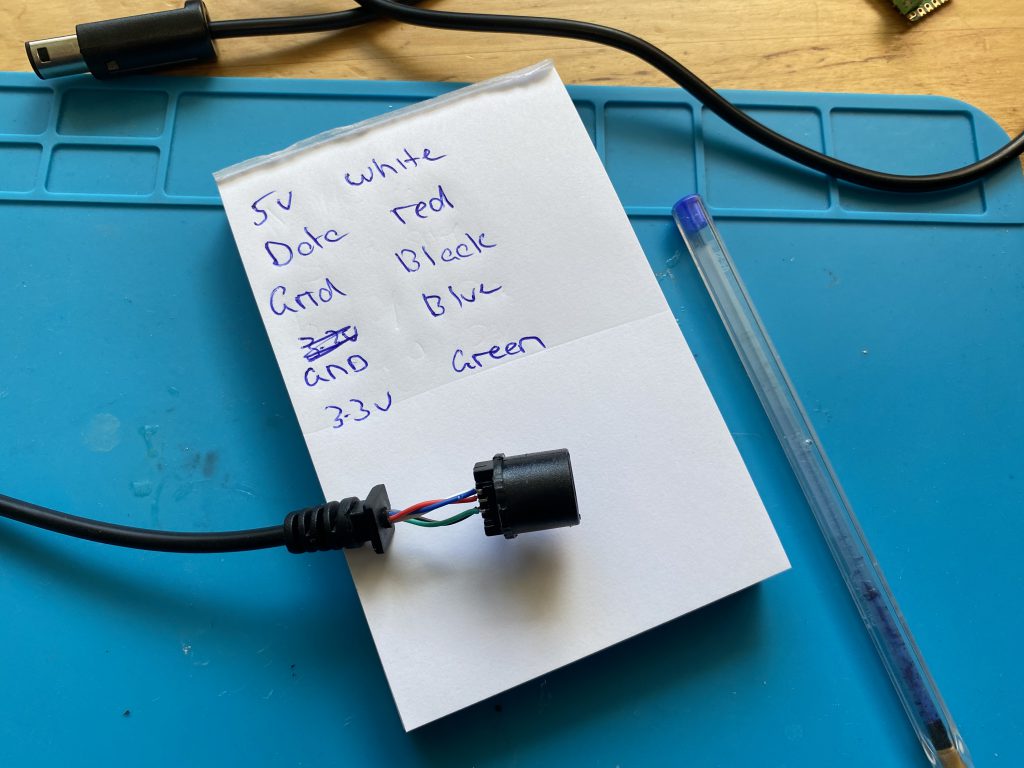
As this GameCube Controller cable is a knock off AliExpress product, we can’t be sure which color wire corresponds to which pin. To help understand, crack open the unused female end of the cable and inspect the pinout.
Use this guide from HackaDay to work out which color wire corresponds to which pin
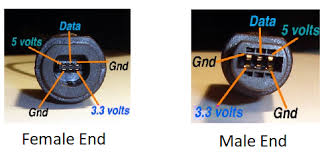
GameCube Controller to RP2040-Zero Pinout
- GC Data -> RP2040 Pin 7
- GC 3.3V -> RP2040 Pin 6
- GC Ground -> RP2040 GND (both GC ground wires can be connected to the same GND pin on the RP2040-Zero)
- GC 5V -> RP2040 5V (sometimes labeled RAW)
I am quite a fan of these green screw terminals for small board projects. I am not an expert at soldering and having to do and undo joints can leave my board massacred. Also, I have a later plan to use these terminals as structural integrity for the cable.
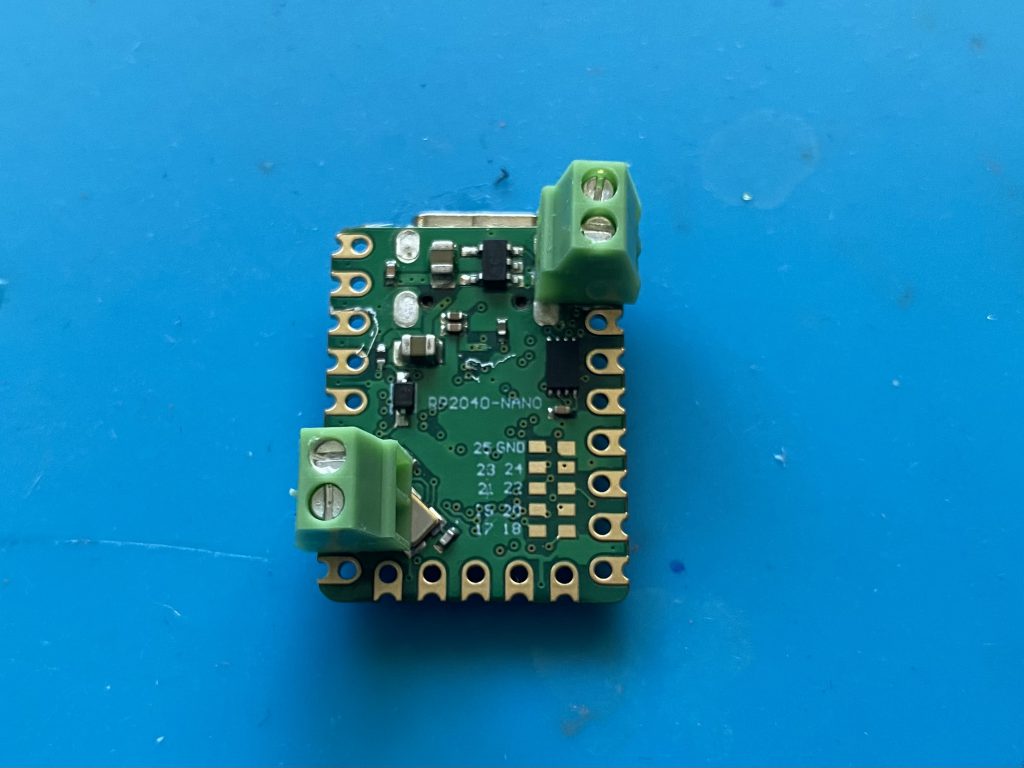
Now you screw in the wires according to the pinout above
Flashing the USBRetro Firmware to the RP2040-Zero
That is basically the physical work done. I will secure the cable a little better at the end of this guide, however what we have here is enough for the project to work.
- Go to the USBRetro GitHub page and get the latest firmware.
- Download the file usbretro_ngc_vx.x.x.uf2
- Connect your RP2040-Zero to your computer with a USB-C cable
- A new drive will show up, it will look like a USB thumb drive has been connected
- Open this new drive and drop usbretro_ngc_vx.x.x.uf2 into the folder
- The RP2040-Zero will now automatically disconnect and flash itself with the new firmware
That is it, your new USB to GameCube controller adapter is ready to go!
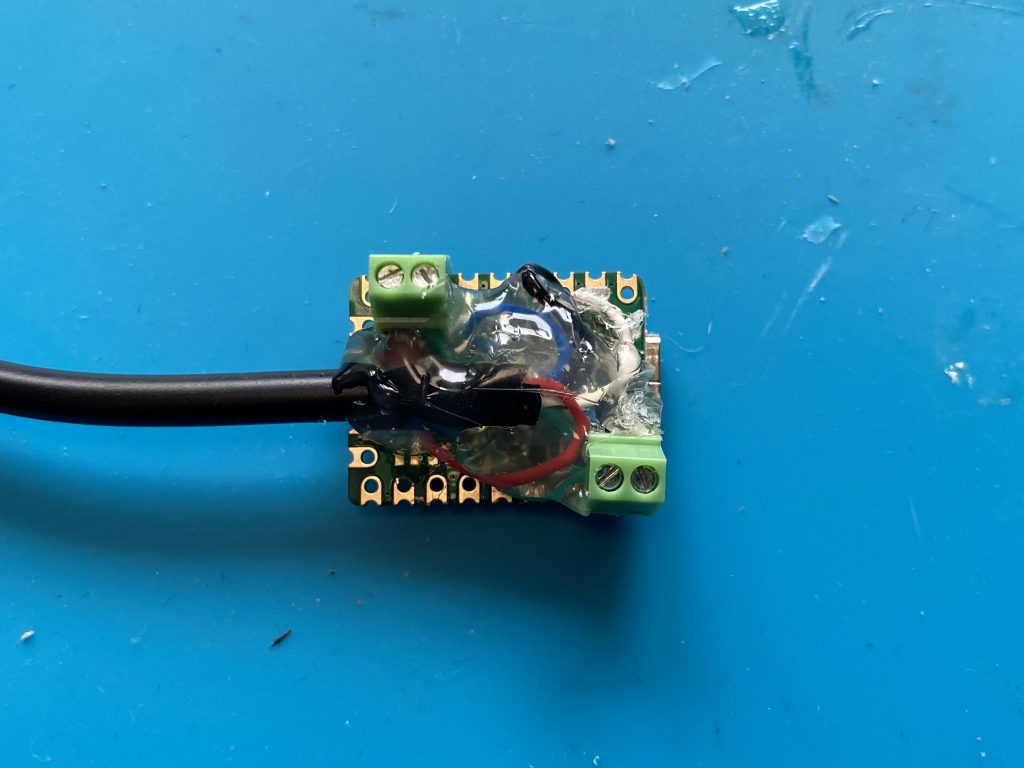
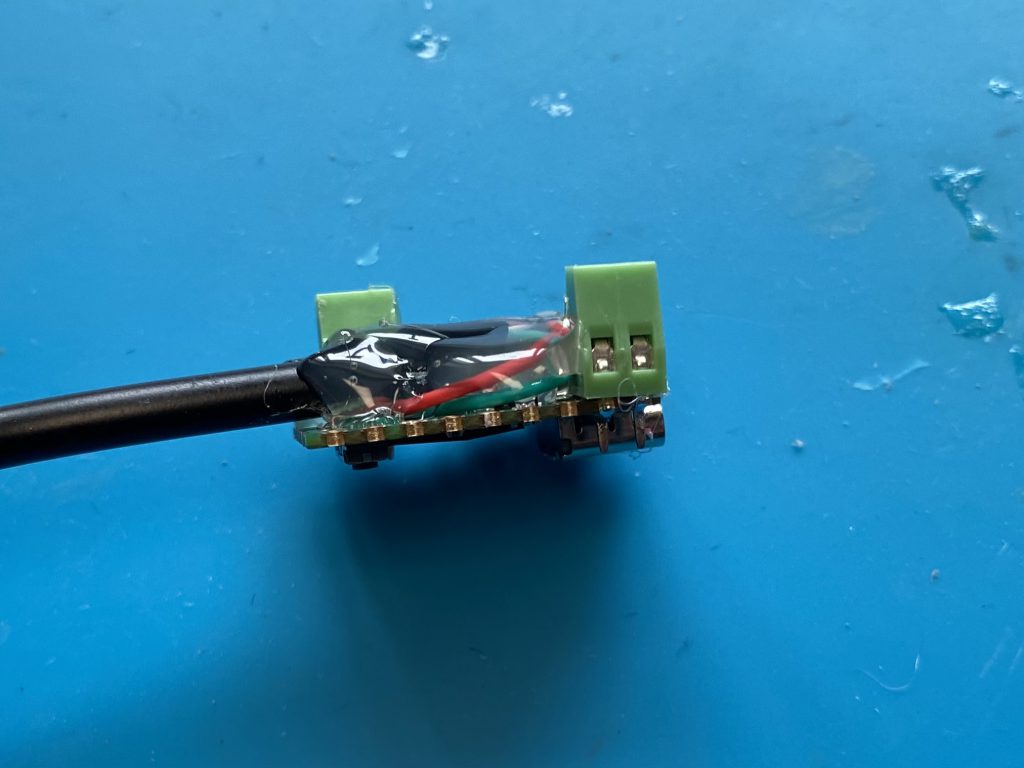
The device is still a little physically janky without a nice 3D printed case. If you have a printer, you can knock up something to mount this inside and secure the cable.
Unfortunately I do not have a 3D printer so I decided to take a rather heretical approach and hot glue the crap out of it. This solution is only recommended as a last choice and is ugly as sin. I will only be using this device for myself in controlled circumstances so I can live with it.
This is where the screw terminals come in handy as they form a structure for the glue to hold on to.
With my new USB to GameCube controller adapter I can now play the 5 (count ’em) shmups on the GameCube with my nice Sanwa arcade stick. Maybe some Phantasy Star Online without having to shell out megabucks for an original GameCube keyboard?