
The sit-down, large monitor arcade machines nicknamed “candy cabs” are amazing ways to experience classic arcade games. They’re versatile and work well with almost all JAMMA-based games, as well as modern emulation devices such as MiSTerCade and others. There’s a few problems that both home-users and modern arcade’s run into though: These were designed to accept coins or tokens to get them started and arcade operators would have to open them up to access menu options. Well, thanks to Tianfeng, now we have a 100% #nocutmod that allows easy access to all of that…using both original boards and emulation! All for less than $5 each including components (check out this ad for ordering instructions). Read on for a full overview and instructions after the links…
Candy Cab Coin Buttons (released via MIT license): https://www.retrorgb.com/assets/Candy_Cab_Coin_Buttons_2022-11-10.zip
Here’s the list of parts I used to assemble them. You can probably use any nuts and bolts you have lying around, but if you need to purchase them, I suggest using the plastic pieces I did; Plastic nuts and bolts are a bit more expensive, but will put less stress on any plastic, wood, or fiberglass cab. Also, they look pretty cool 🙂
Main Button (3x per board): https://www.digikey.com/en/products/detail/cui-devices/TS02-66-140-BK-160-LCR-D/15634257
Bolt (2x per board): https://www.digikey.com/en/products/detail/essentra-components/50M020040H025/11639373
Nut (2x per board): https://www.digikey.com/en/products/detail/essentra-components/04M020040HN/9677098
Thick Washer (2x – 4x per board): https://www.digikey.com/en/products/detail/essentra-components/FW0040A/4105012
Thin Washer (2x – 4x per board): https://www.digikey.com/en/products/detail/essentra-components/16M02050080/10299172
First, start by carefully unbolting the coin slot on your Candy Cab’s control panel and make sure yours looks similar – Two mounting holes with the coin slot in the middle. There will be a bit of tolerance for variations, but yours needs to be similar, or it won’t fit (click all pictures for a full-sized view):
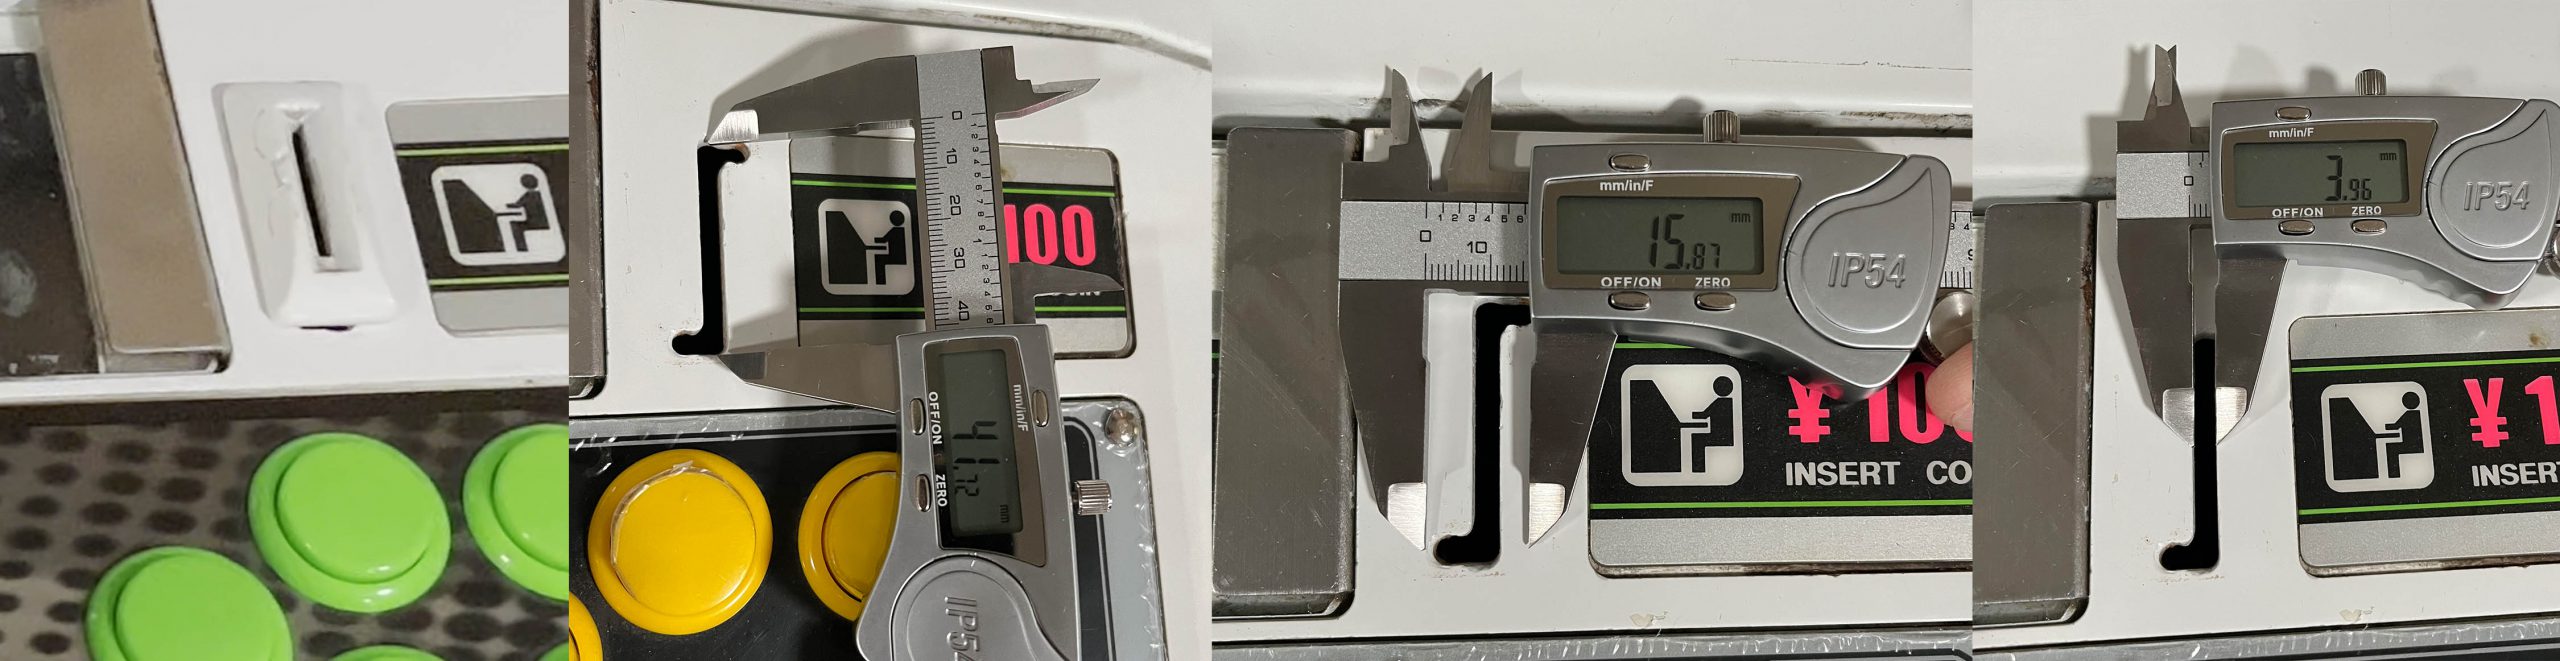
I’m pretty sure all Sega cabs will be a drop-in replacement, but my Sammy Video World needed the coin slot lengthened. While I’m all about no-cut mods, this coin slot was already hacked into (the bottom was like that already), so I had no issue lengthening the hole with a file – It will all be covered anyway:

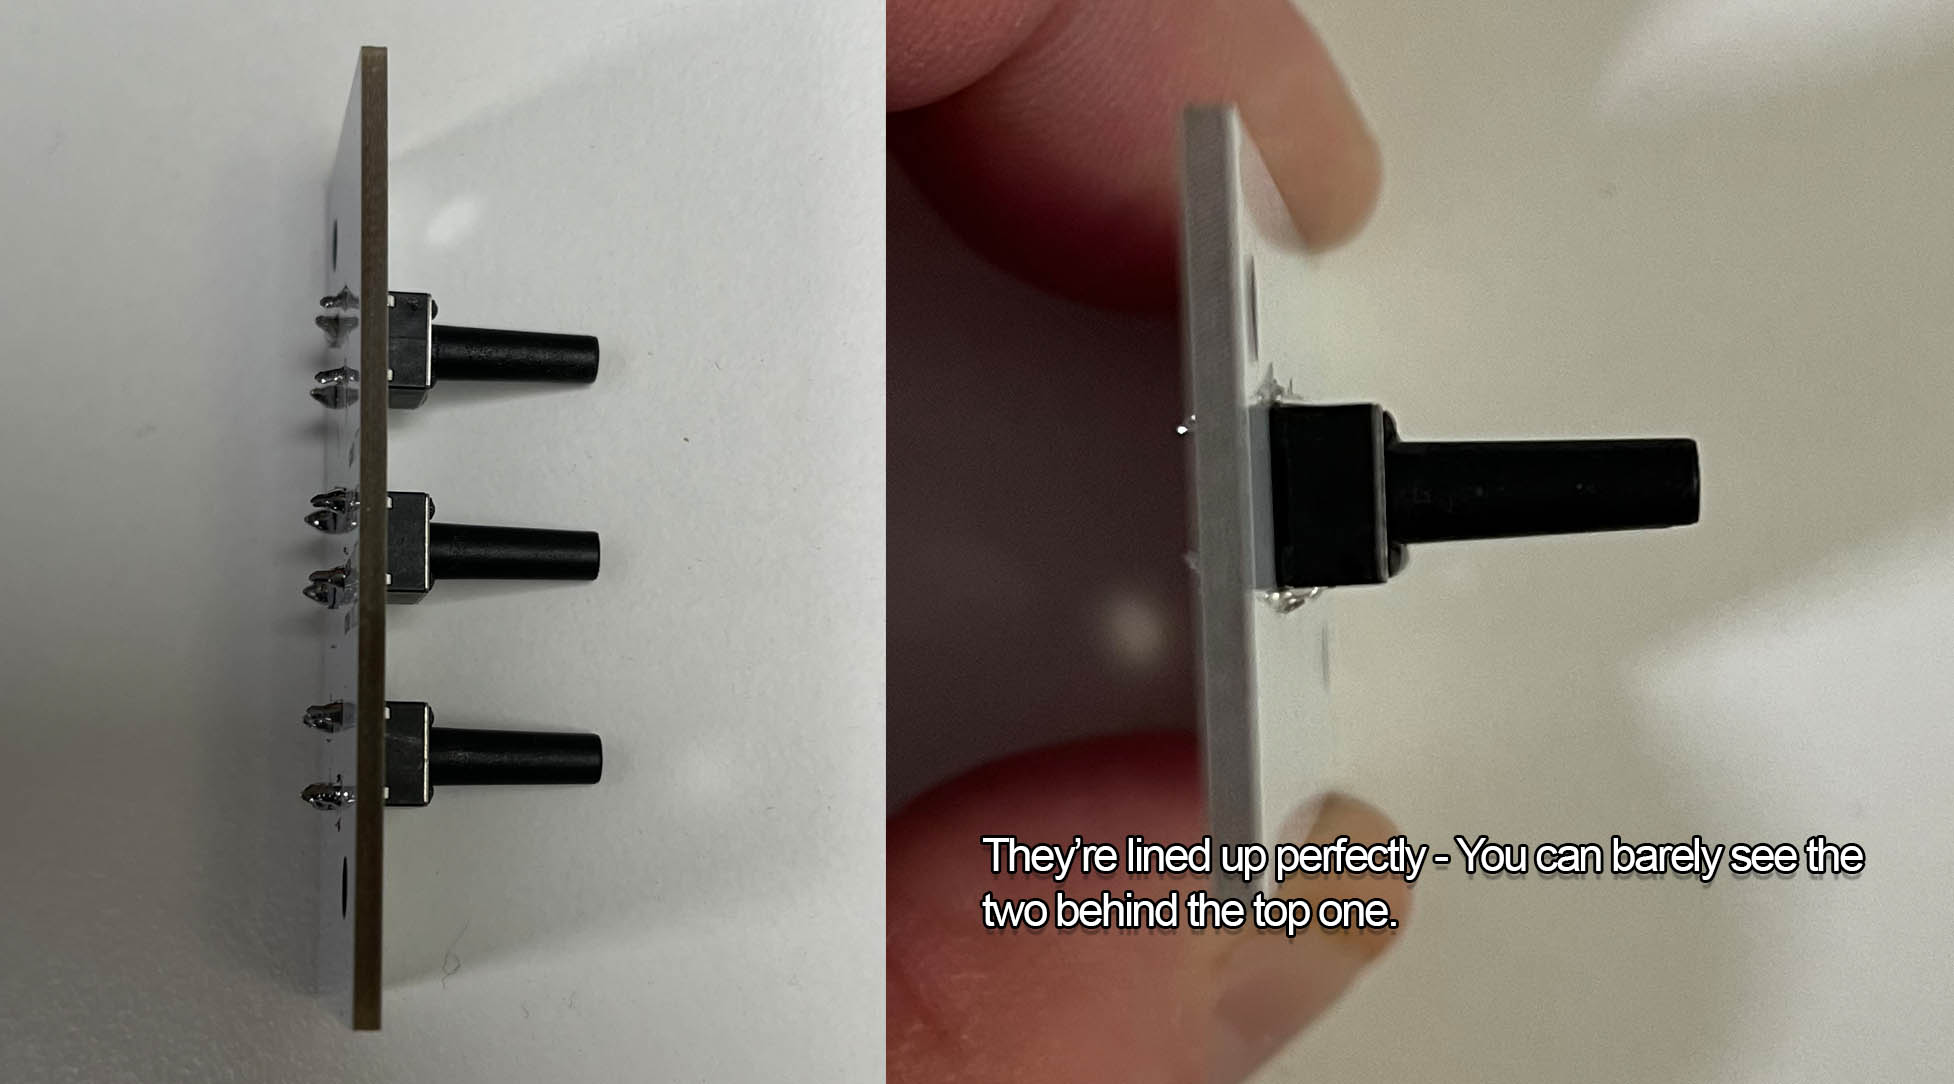
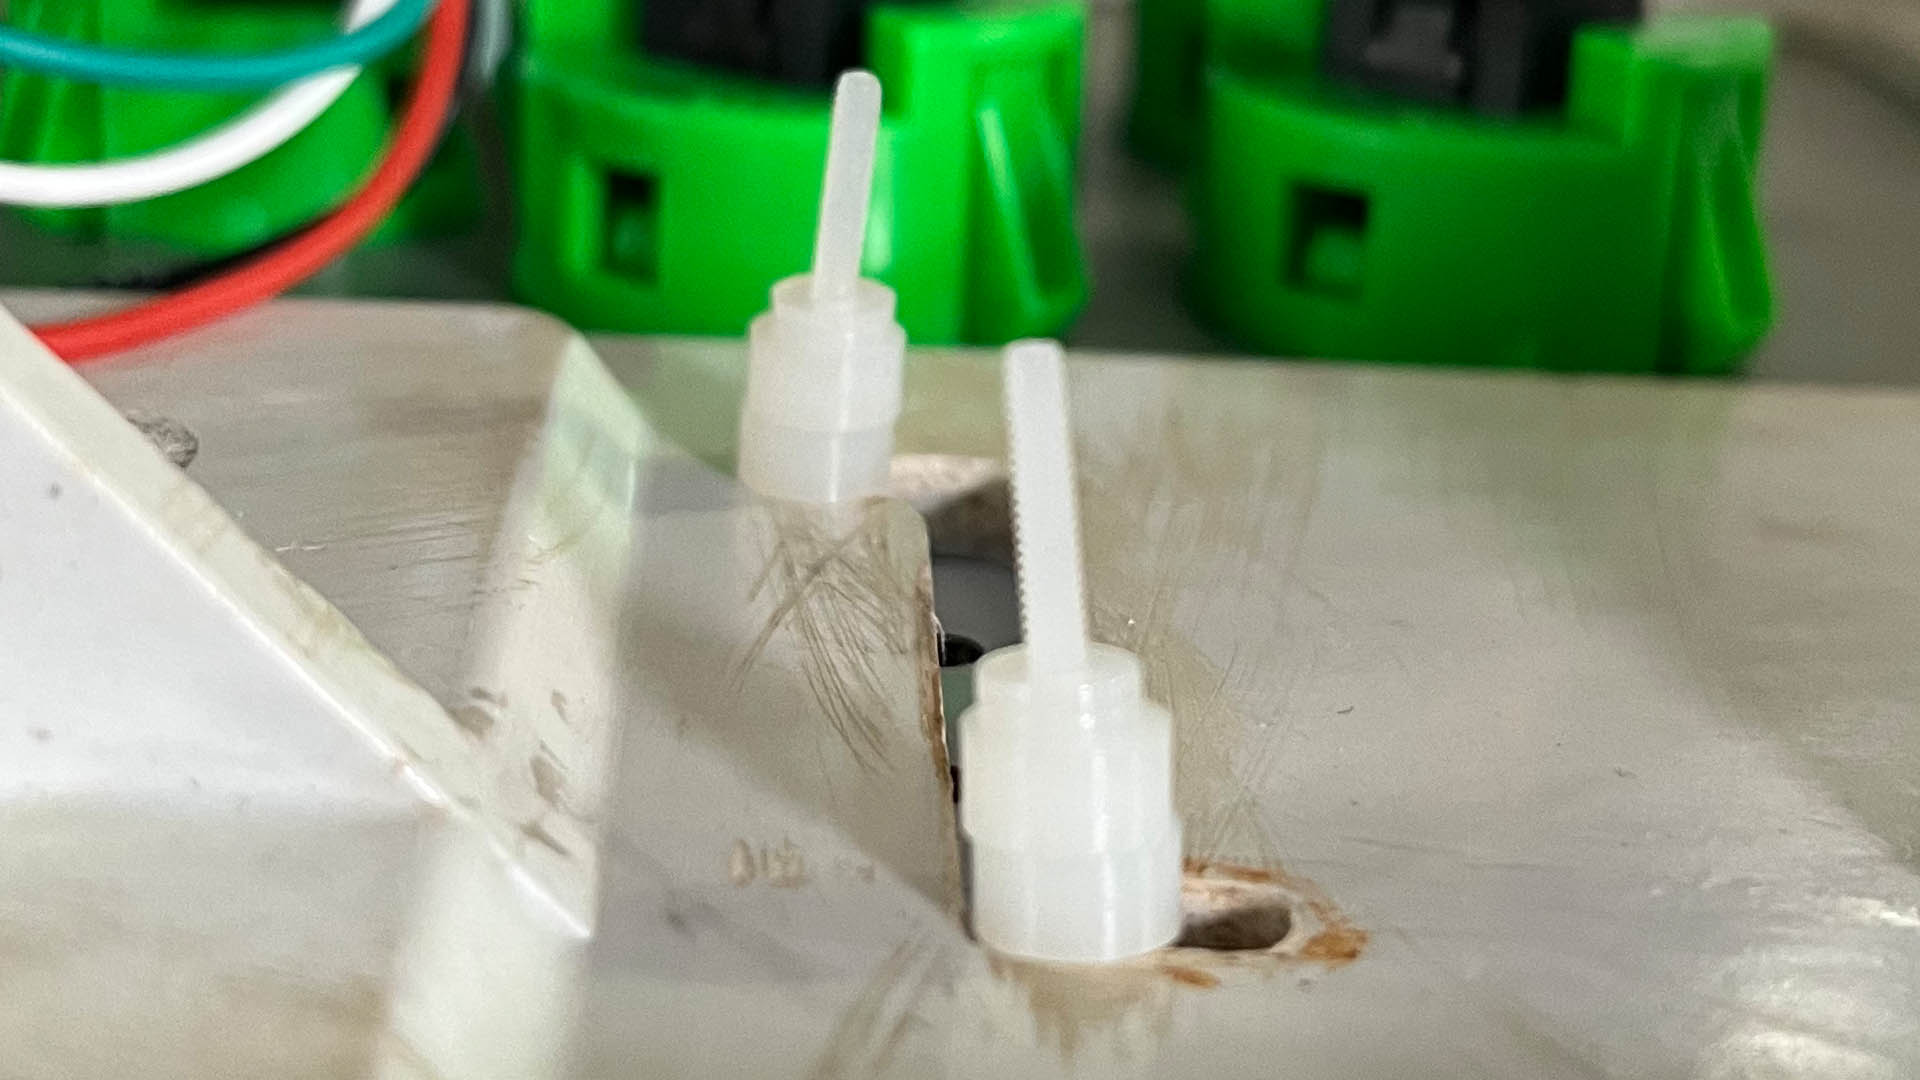
Once you’ve confirmed the board will fit, solder three buttons to the bottom piece. You’ll want to make sure they’re uniform – If you solder one in crooked, it might not align with the holes, or one might be “pressed” when fitting it in:
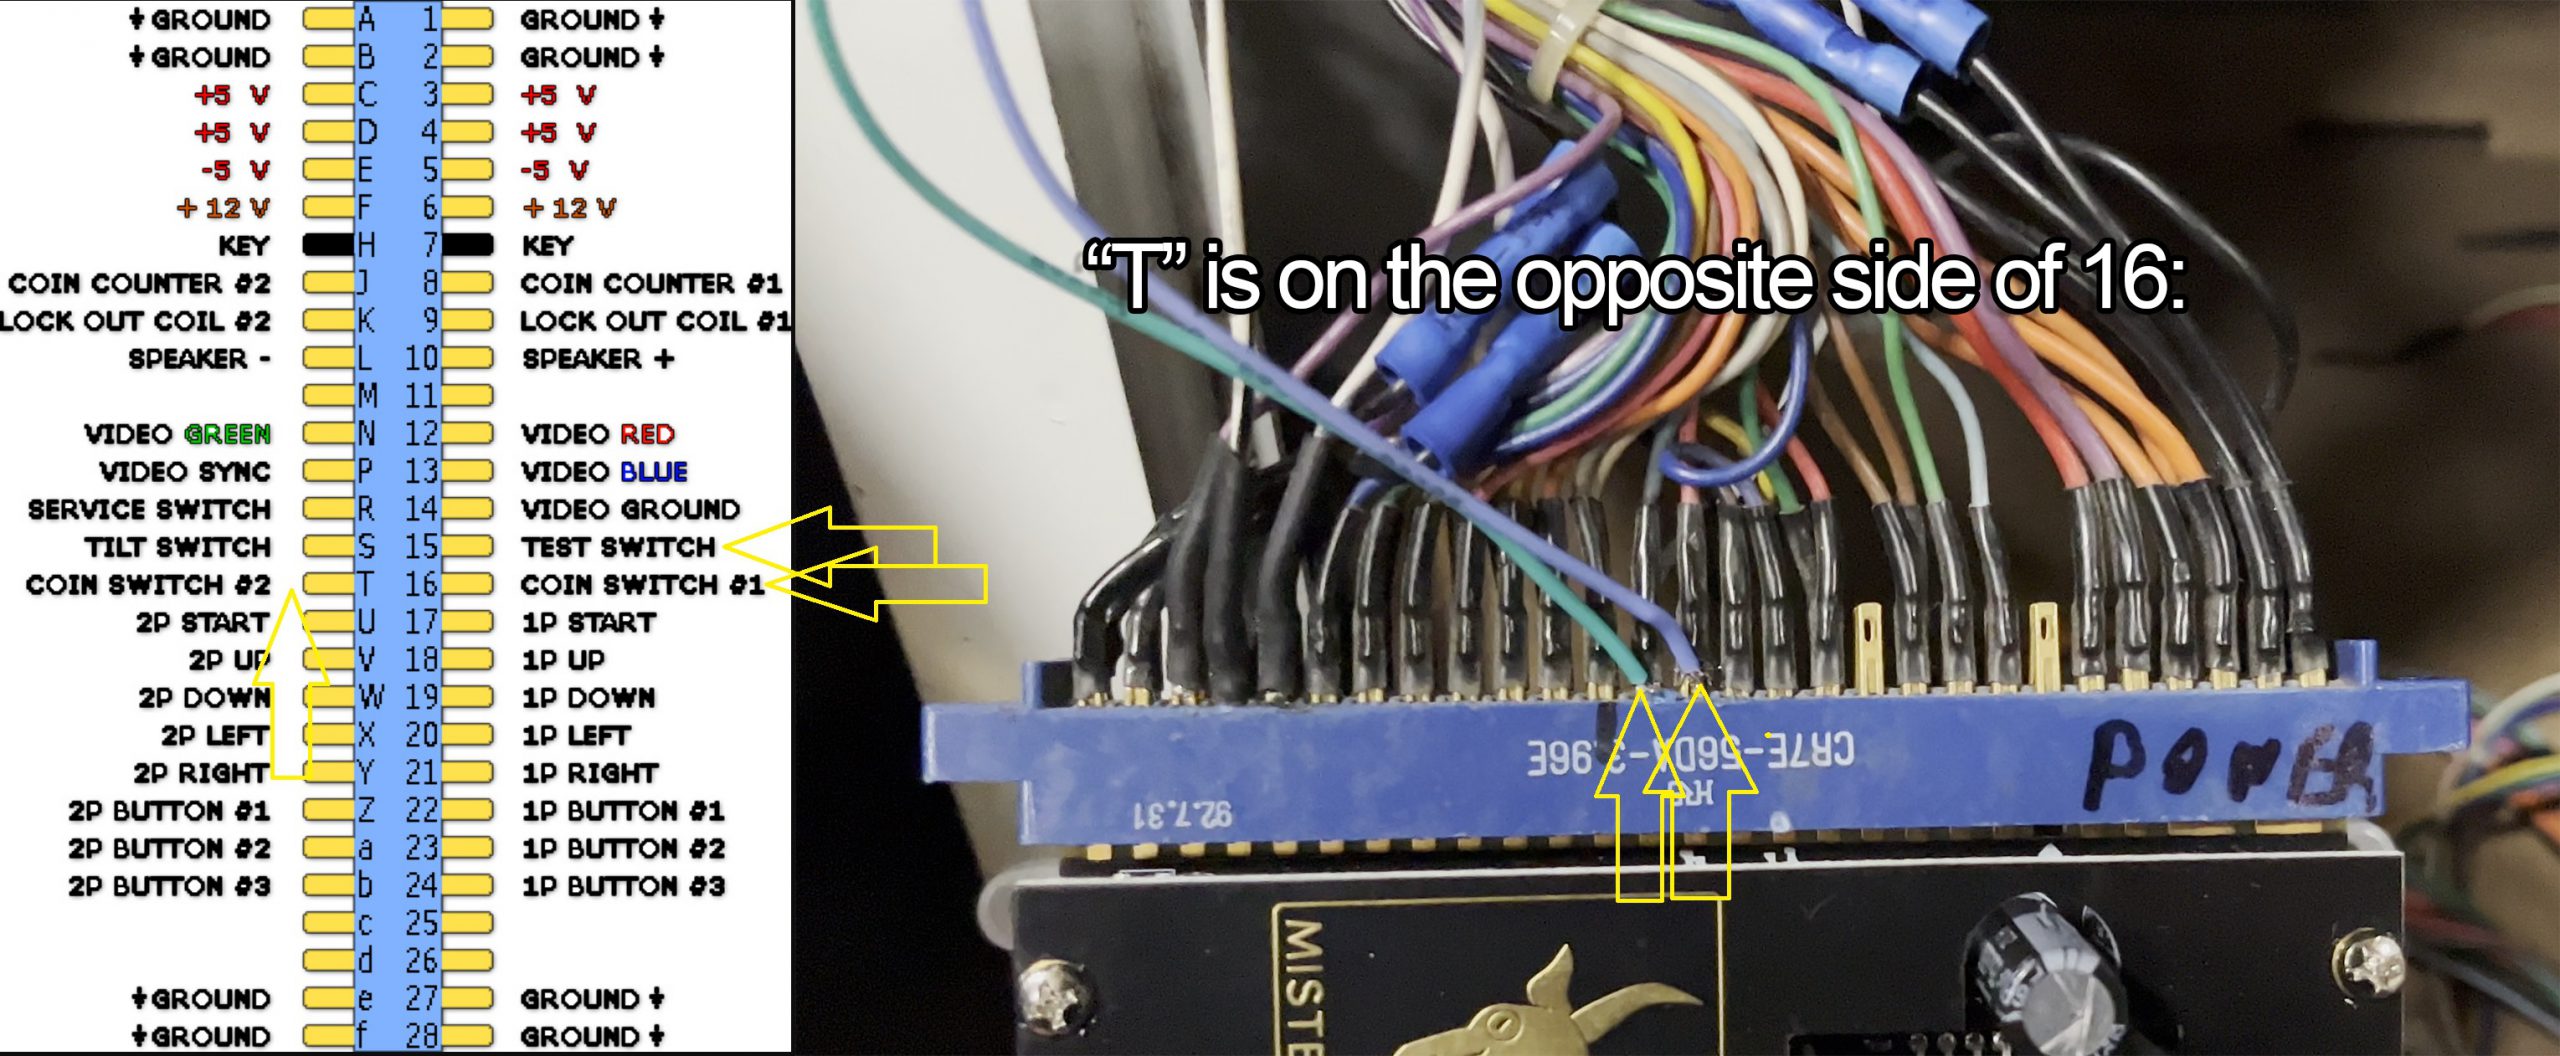
Next, solder three wires to the Coin 1, Coin 2, and Test Menu buttons on your JAMMA harness; These are Pins 16, T and 15 respectively:
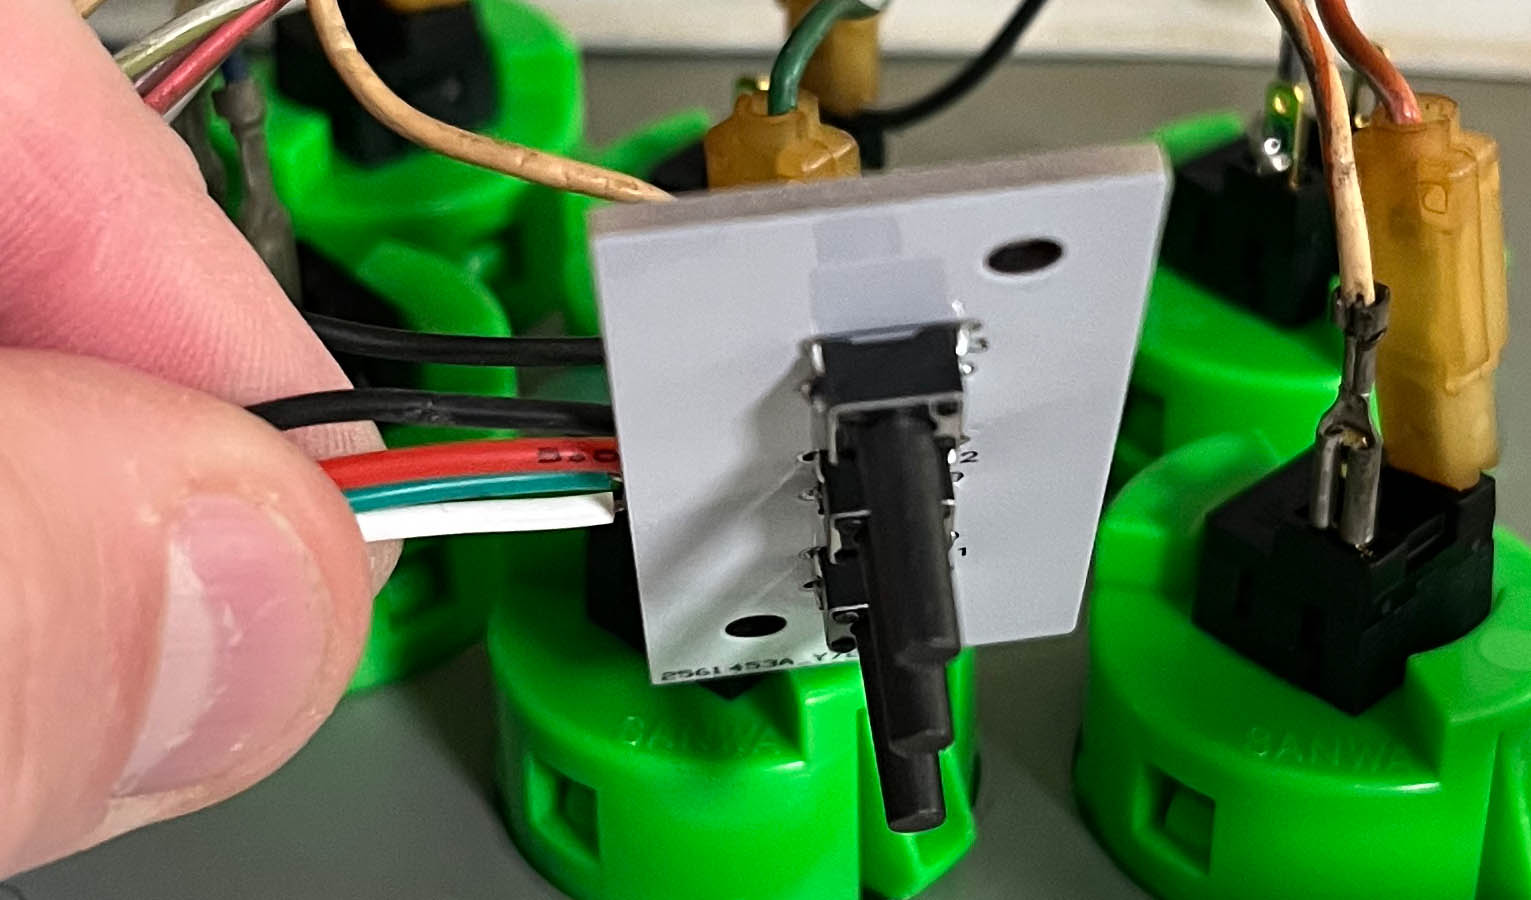
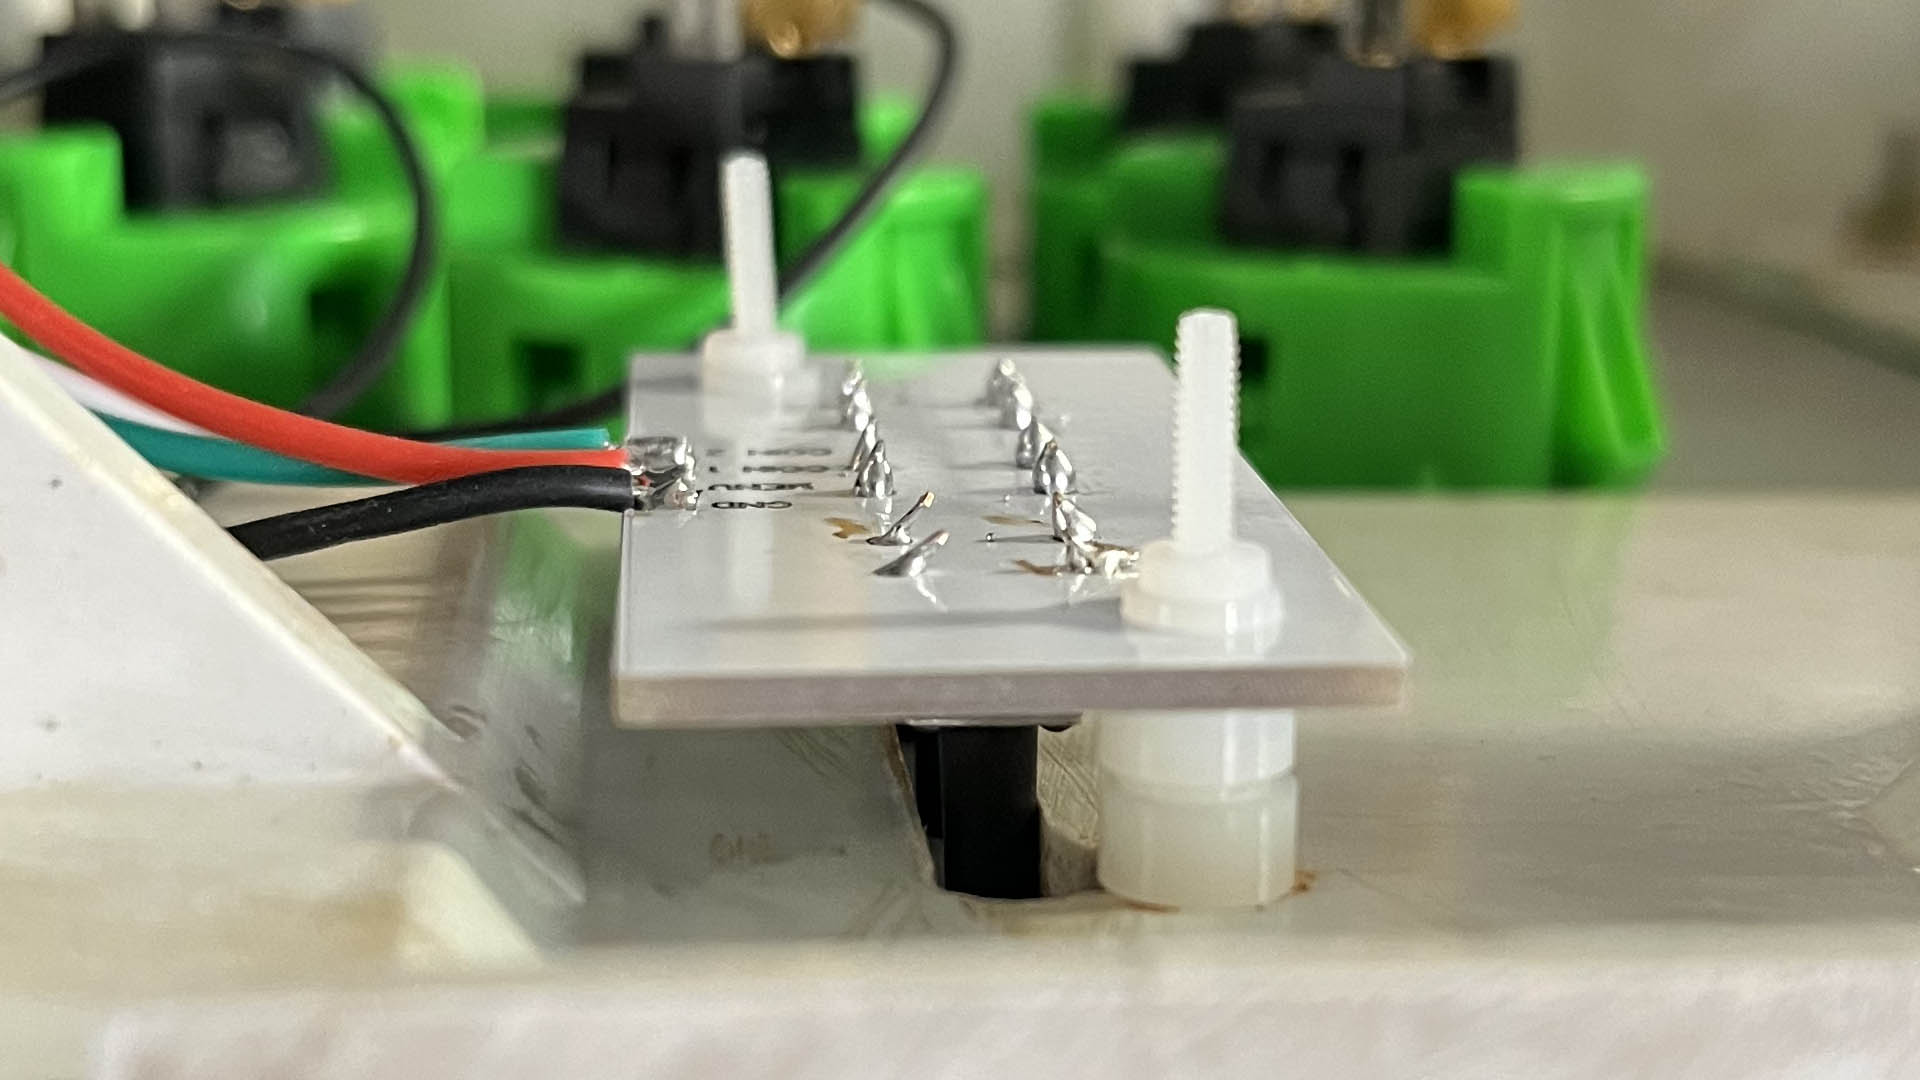
Run those cables up from the harness to the inside of your control panel and solder them, as well as ground (I just pulled from the buttons) to the bottom board assembly:
Now insert the top piece – And here’s where everyone’s cab is going to be different, depending on the thickness of the control panel. I started with two large washers on each, but that wasn’t enough: As soon as I put the pieces together, the buttons all “pressed”. I then added two smaller washers as shown here and then the buttons didn’t go through enough to press them at all. I ended up using two large and one small washer on my Astro City and it lined up perfectly (more pics below):
The control panel on my Sammy cab was thinner, so I used three of the larger washers. While I probably could have just use two and let the buttons stick out, I think a “flush” look is best, but that’s totally up to you:
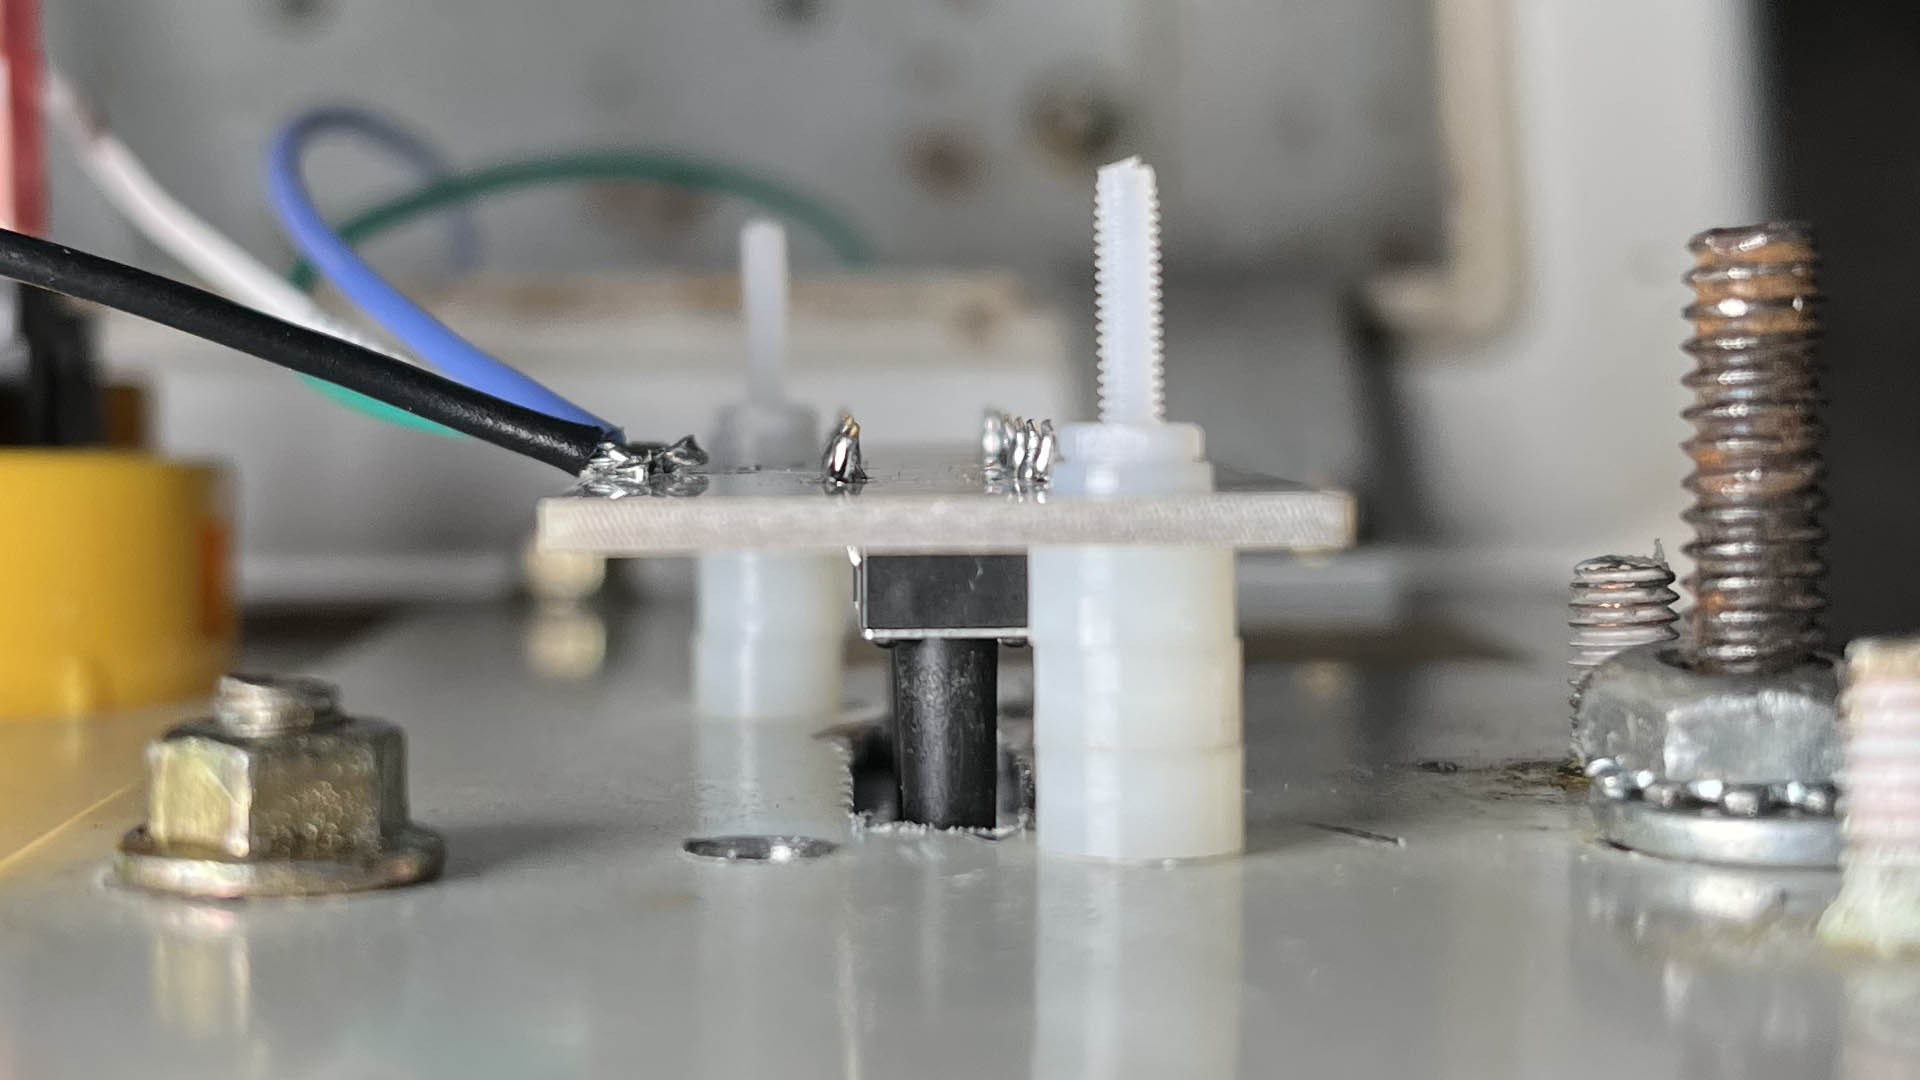
Once you’ve got the perfect combo of washers to space it out, put the pieces together, add one more washer on the outside and add the bolt. I used a screwdriver and pliers to tighten it down, but DO NOT OVERTIGHTEN!!! Even though the plastic screws are soft, you don’t want to squish the buttons, or damage the control panel:
Now what you should be left with, are buttons that can just barely be pressed – Basically, the height should be just less than the screws so you can’t accidentally hit the menu button in-game, but high enough so you don’t have to struggle to press them. I promise, that’s not as hard as it sounds; Just use the washers and plan on a few tries to get it right:
While this is such a simple idea, it solves a ton of issues:
-
You don’t have to manually enter every game’s service menu and set it to freeplay.
This saves time and it a bit more fun, since you still have to “insert a coin”. I also like doing this, because I’ll often “give myself two dollars” (or something) when playing an arcade game – I’ll load up a set amount of credits and see how far I can get. This is my way of trying to get better at a game, without just giving myself “unlimited lives”. -
It’s nice to have access to both coin buttons.
I’d say 99% of games react the same regardless of which coin slot is used, but there are definitely a few that assign a player based on which slot entered a coin. This totally solves that. -
My favorite part about this board is the dual-functionality of the “Menu” button – On most original arcade boards, this will activate the test menu, allowing easy access to all the options…
…but if you’re using an emulation solution like MiSTer, Raspberry Pi, etc, you can simply map this button to the OSD. Can’t get any easier than that!!!
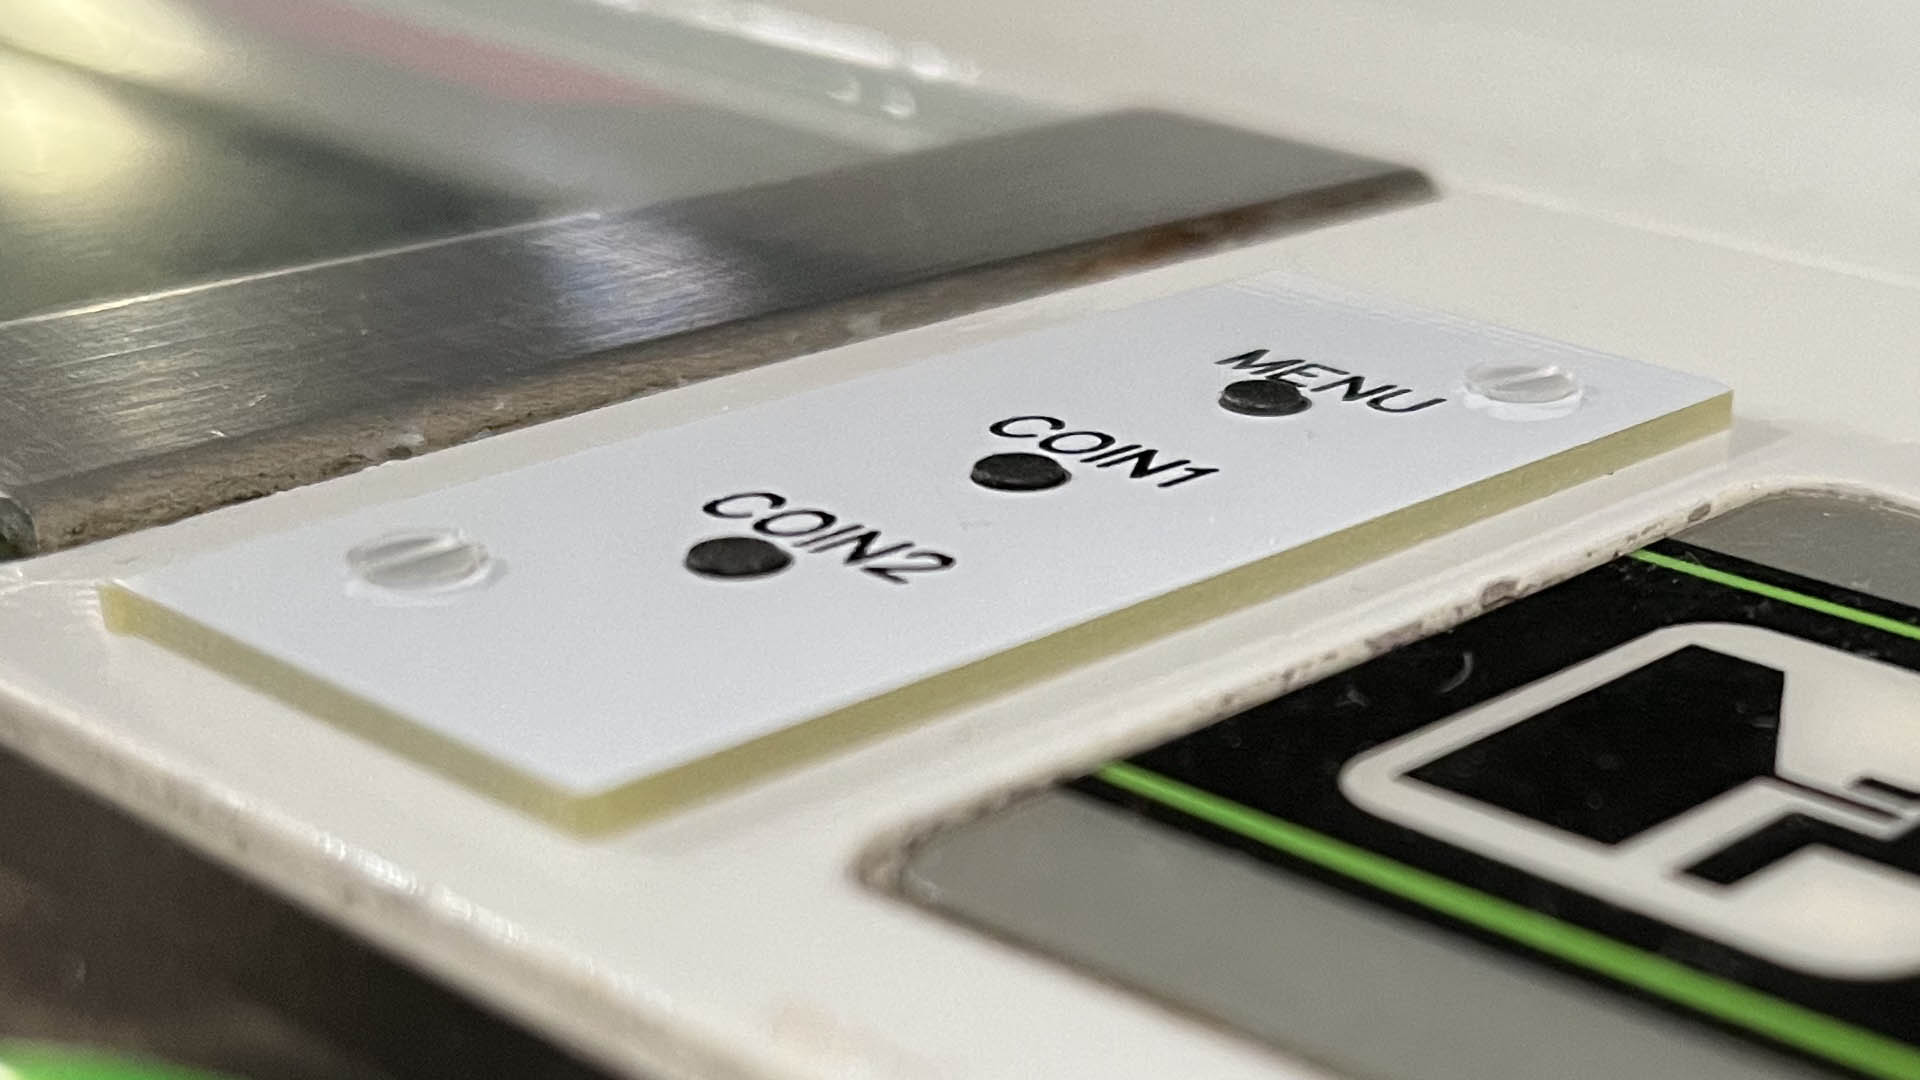
So, here you go – Have at it!: While it’s current form isn’t very “flashy”, it’s really cheap to make and works exactly as I hoped! That said, absolutely feel free to come up with cooler-looking top plates, modify it to fit different model cabs…whatever you’d like! As long as you use this in place of cutting new holes in existing cabs, it’s a complete and total win!
If you own a Candy Cab, you'll absolutely want to check out this open source, Coin/Menu button board @Tian_Feng44 just released! This is what I showed on the podcast last week, that I had made through @JLCPCB!https://t.co/ElJeWoxliC pic.twitter.com/Bi0YVB6TVZ
— Bob from RetroRGB (@RetroRGB) November 19, 2022
